Getting started with the new slides editor
The new slides editor is a powerful, canvas-based presentation tool that lets you create beautiful, interactive slide decks for your classroom. Whether you're building a lesson from scratch or using a template, the editor gives you full control over text, images, videos, apps, drawing tools, and more.
If you're coming from the old slides editor, you'll find the new editor is a big step up — with a more intuitive layout, richer formatting options, and every app available to embed directly into your slides.
The editor layout
When you open a slide deck, you'll see four main areas:
Top bar
The top bar gives you quick access to common actions:
- Menu button (top-left): Object snapping mode, grid overlay mode, exit editor.
- Undo / Redo: Step backwards or forwards through your changes
- Duplicate / Delete: Quick actions for the selected object
- Title: Click to edit your deck's title
- Sharing / Planner: Top-right controls for sharing and planner connection

Slide manager (left panel)
The slide manager shows thumbnail previews of all your slides. Use it to:
- Click a slide to navigate to it
- Drag slides to reorder them
- Hover over a slide and click the trash can to delete it
- Click the + button to add a new slide (or use the dropdown arrow to add from a template, or import from another deck)


Canvas (centre)
The large centre area is your slide canvas. This is where you add and arrange content — text, images, shapes, apps, and more. You can zoom in and out, pan around, and click on objects to select and edit them.

Floating toolbar
When you select an object on the canvas, a floating toolbar appears nearby with context-specific actions — formatting options for text, settings for apps, colour pickers for shapes, and more. The toolbar adapts to whatever you have selected.

Click the object to change its background colour and capacity.
Tools sidebar (right panel)
The right sidebar is organised into tabs:
| Tab | Shortcut | What it does |
|---|---|---|
| Apps | Shift+A | Browse and insert interactive apps |
| Templates | Shift+T | Browse and apply slide templates |
| Insert | Shift+I | Add text, arrows, notes, tables, lists, images, and videos |
| Draw | Shift+D | Access drawing tools and shapes |
| Settings | — | Configure the selected app |
| Slide | — | Set slide name and background |
Click a tab to open it, or press the keyboard shortcut. Press the same shortcut again to close the panel.

Bottom bar
At the bottom you'll find:
- Slide manager toggle: Show or hide the left panel
- Grid view button: Open a grid overview of all your slides for quick reordering and bulk actions
- Zoom controls: Zoom in/out slider, percentage display, and a fit-to-slide button


Grid view
Creating your first slide
- Open a slide deck (or create a new one)
- Your first slide is already waiting for you on the canvas
- Double-click anywhere on the slide to start adding text
- Use the Apps tab to add interactive learning tools, or the Draw tab to add shapes

Adding more slides
Click the + button at the top of the slide manager to add a blank slide. To start from a template, click the dropdown arrow next to the + button and browse the template library.


Choose a slide template to insert in your new page.

You can also add a template via the sidebar
Adding content to your slides
Text
Click or double-click on the slide to create a text box. Once you start typing, a floating toolbar appears above your text with formatting options:
- Font family and size
- Bold, italic, underline
- Text colour and alignment
- Bullet lists and numbered lists
- Links
- Background colour and borders

Apps
Open the Apps tab (Shift+A) to browse interactive apps you can embed directly in your slides — from learning tools like Word Builder and Base Ten Blocks to timers, spinners, and more.

Scroll or search the app you want to embed and click anywhere on the canvas to add
Images, videos, and music
Open the Insert tab (Shift+I) to add images, videos, text, arrows, notes, tables, and lists.

Shapes and drawing
Open the Draw tab (Shift+D) for pencil, eraser, highlight, laser pointer, and geometry shapes.

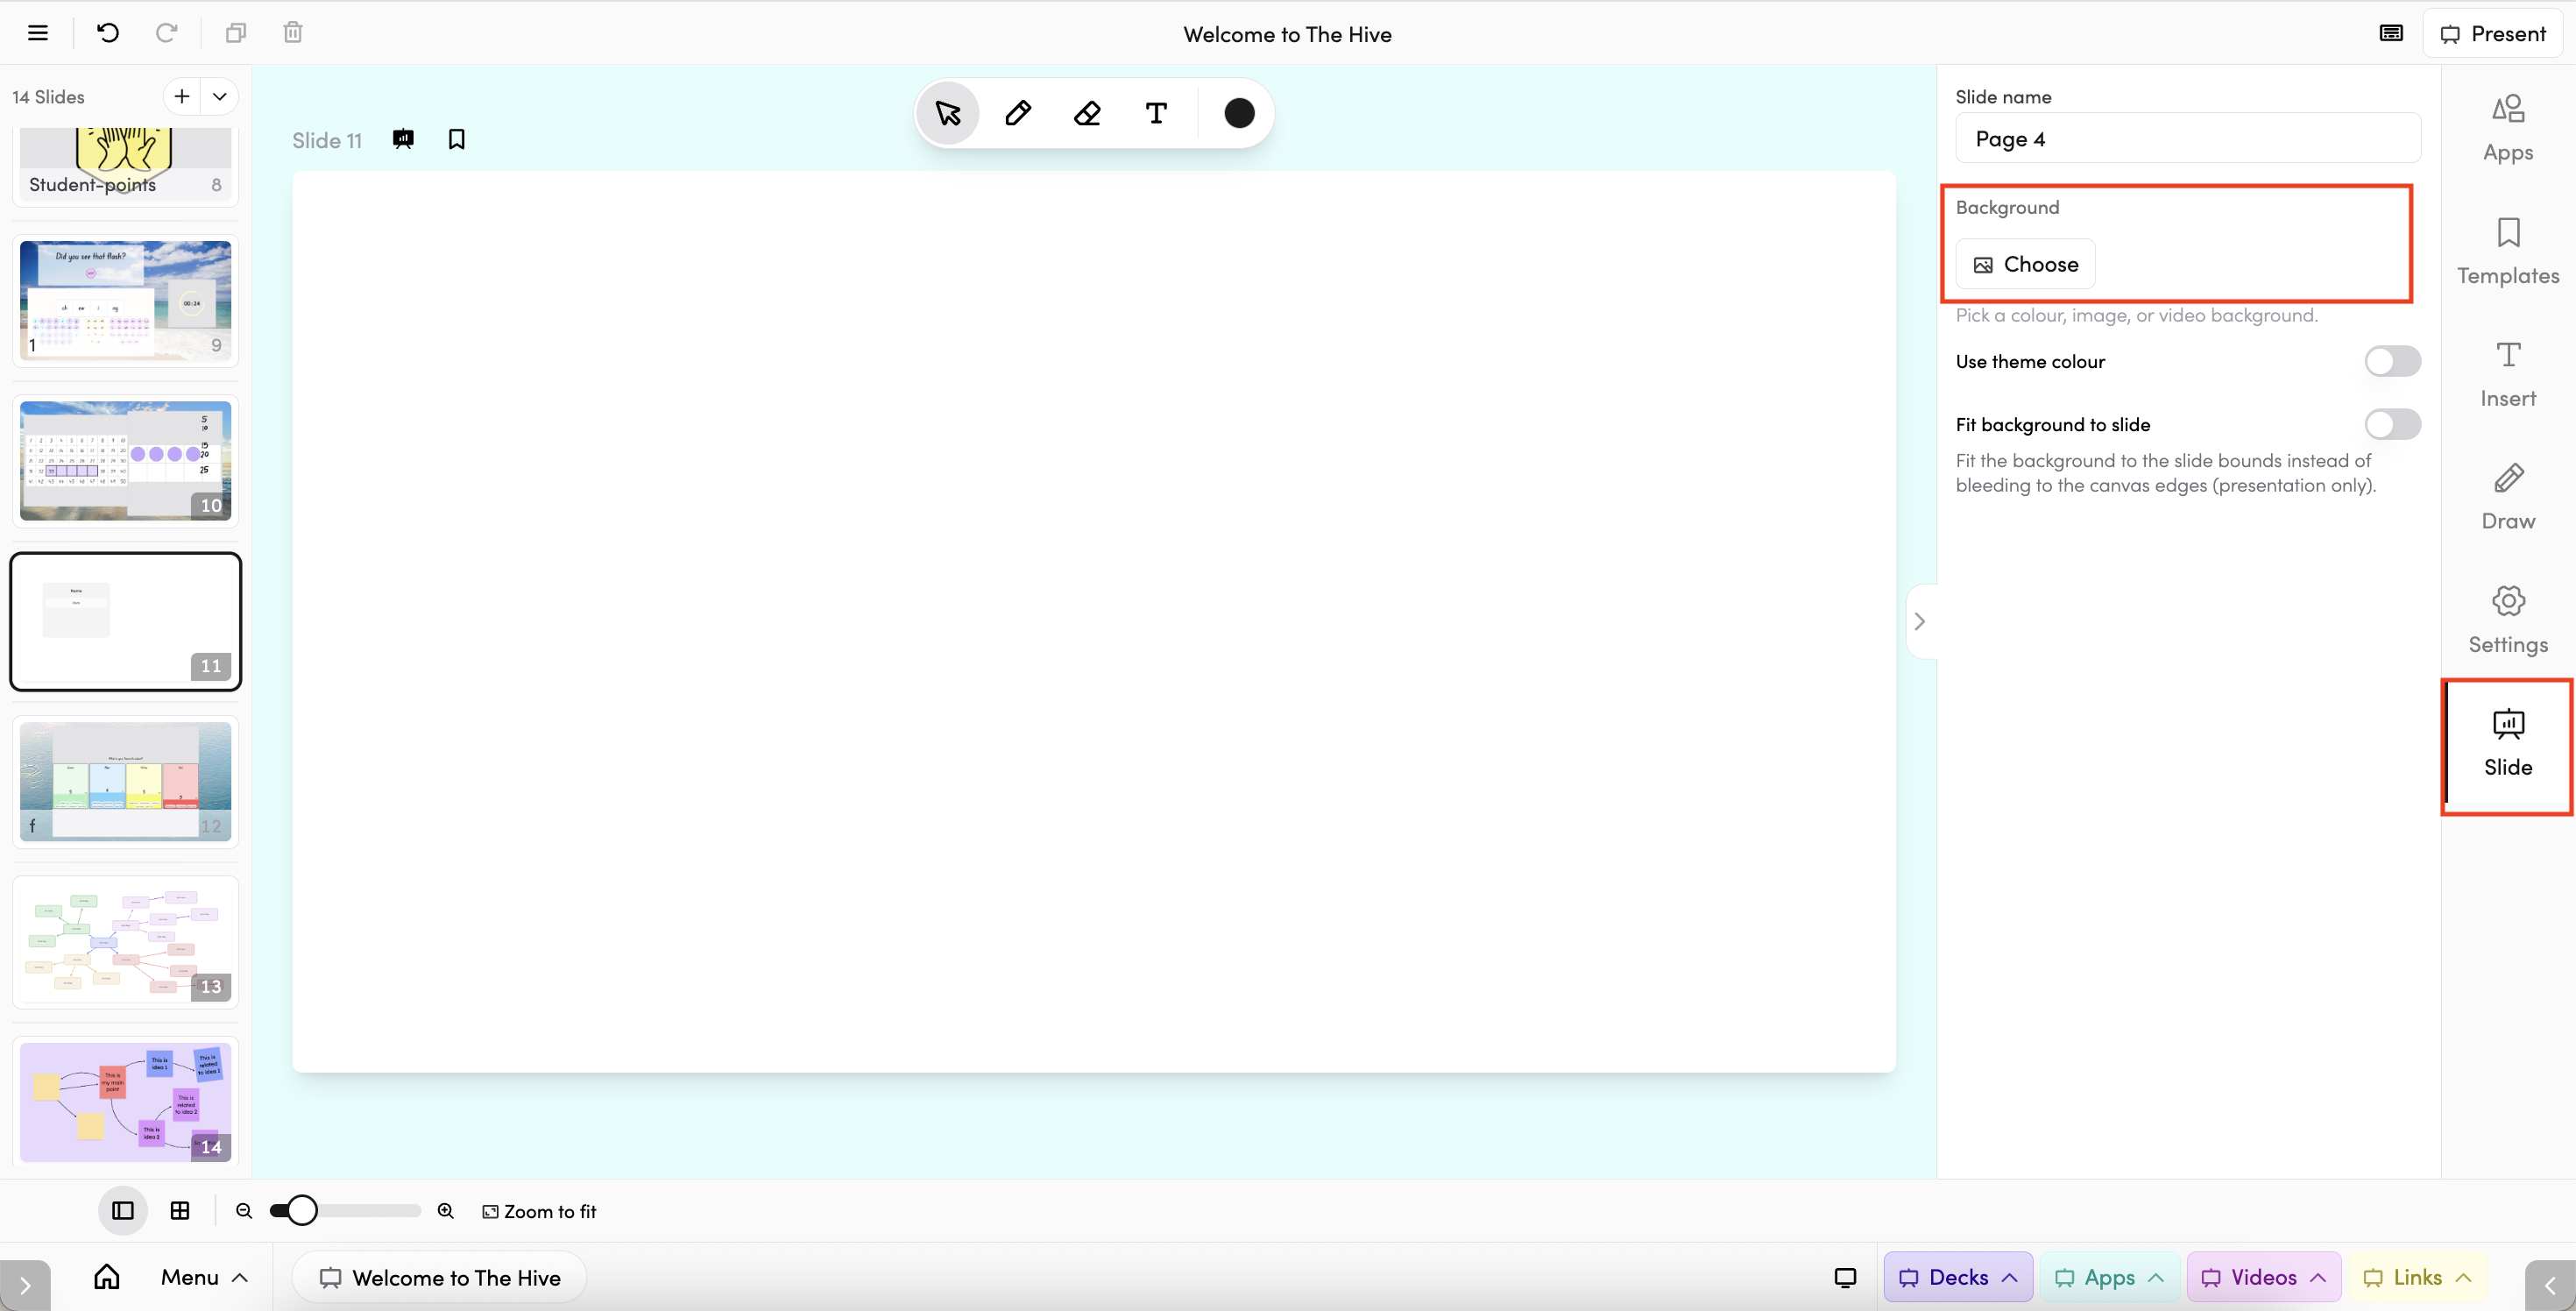
Slide Background
To change the background of a slide, click the Slide tab in the right panel. Under Background, click Choose to open the background picker.
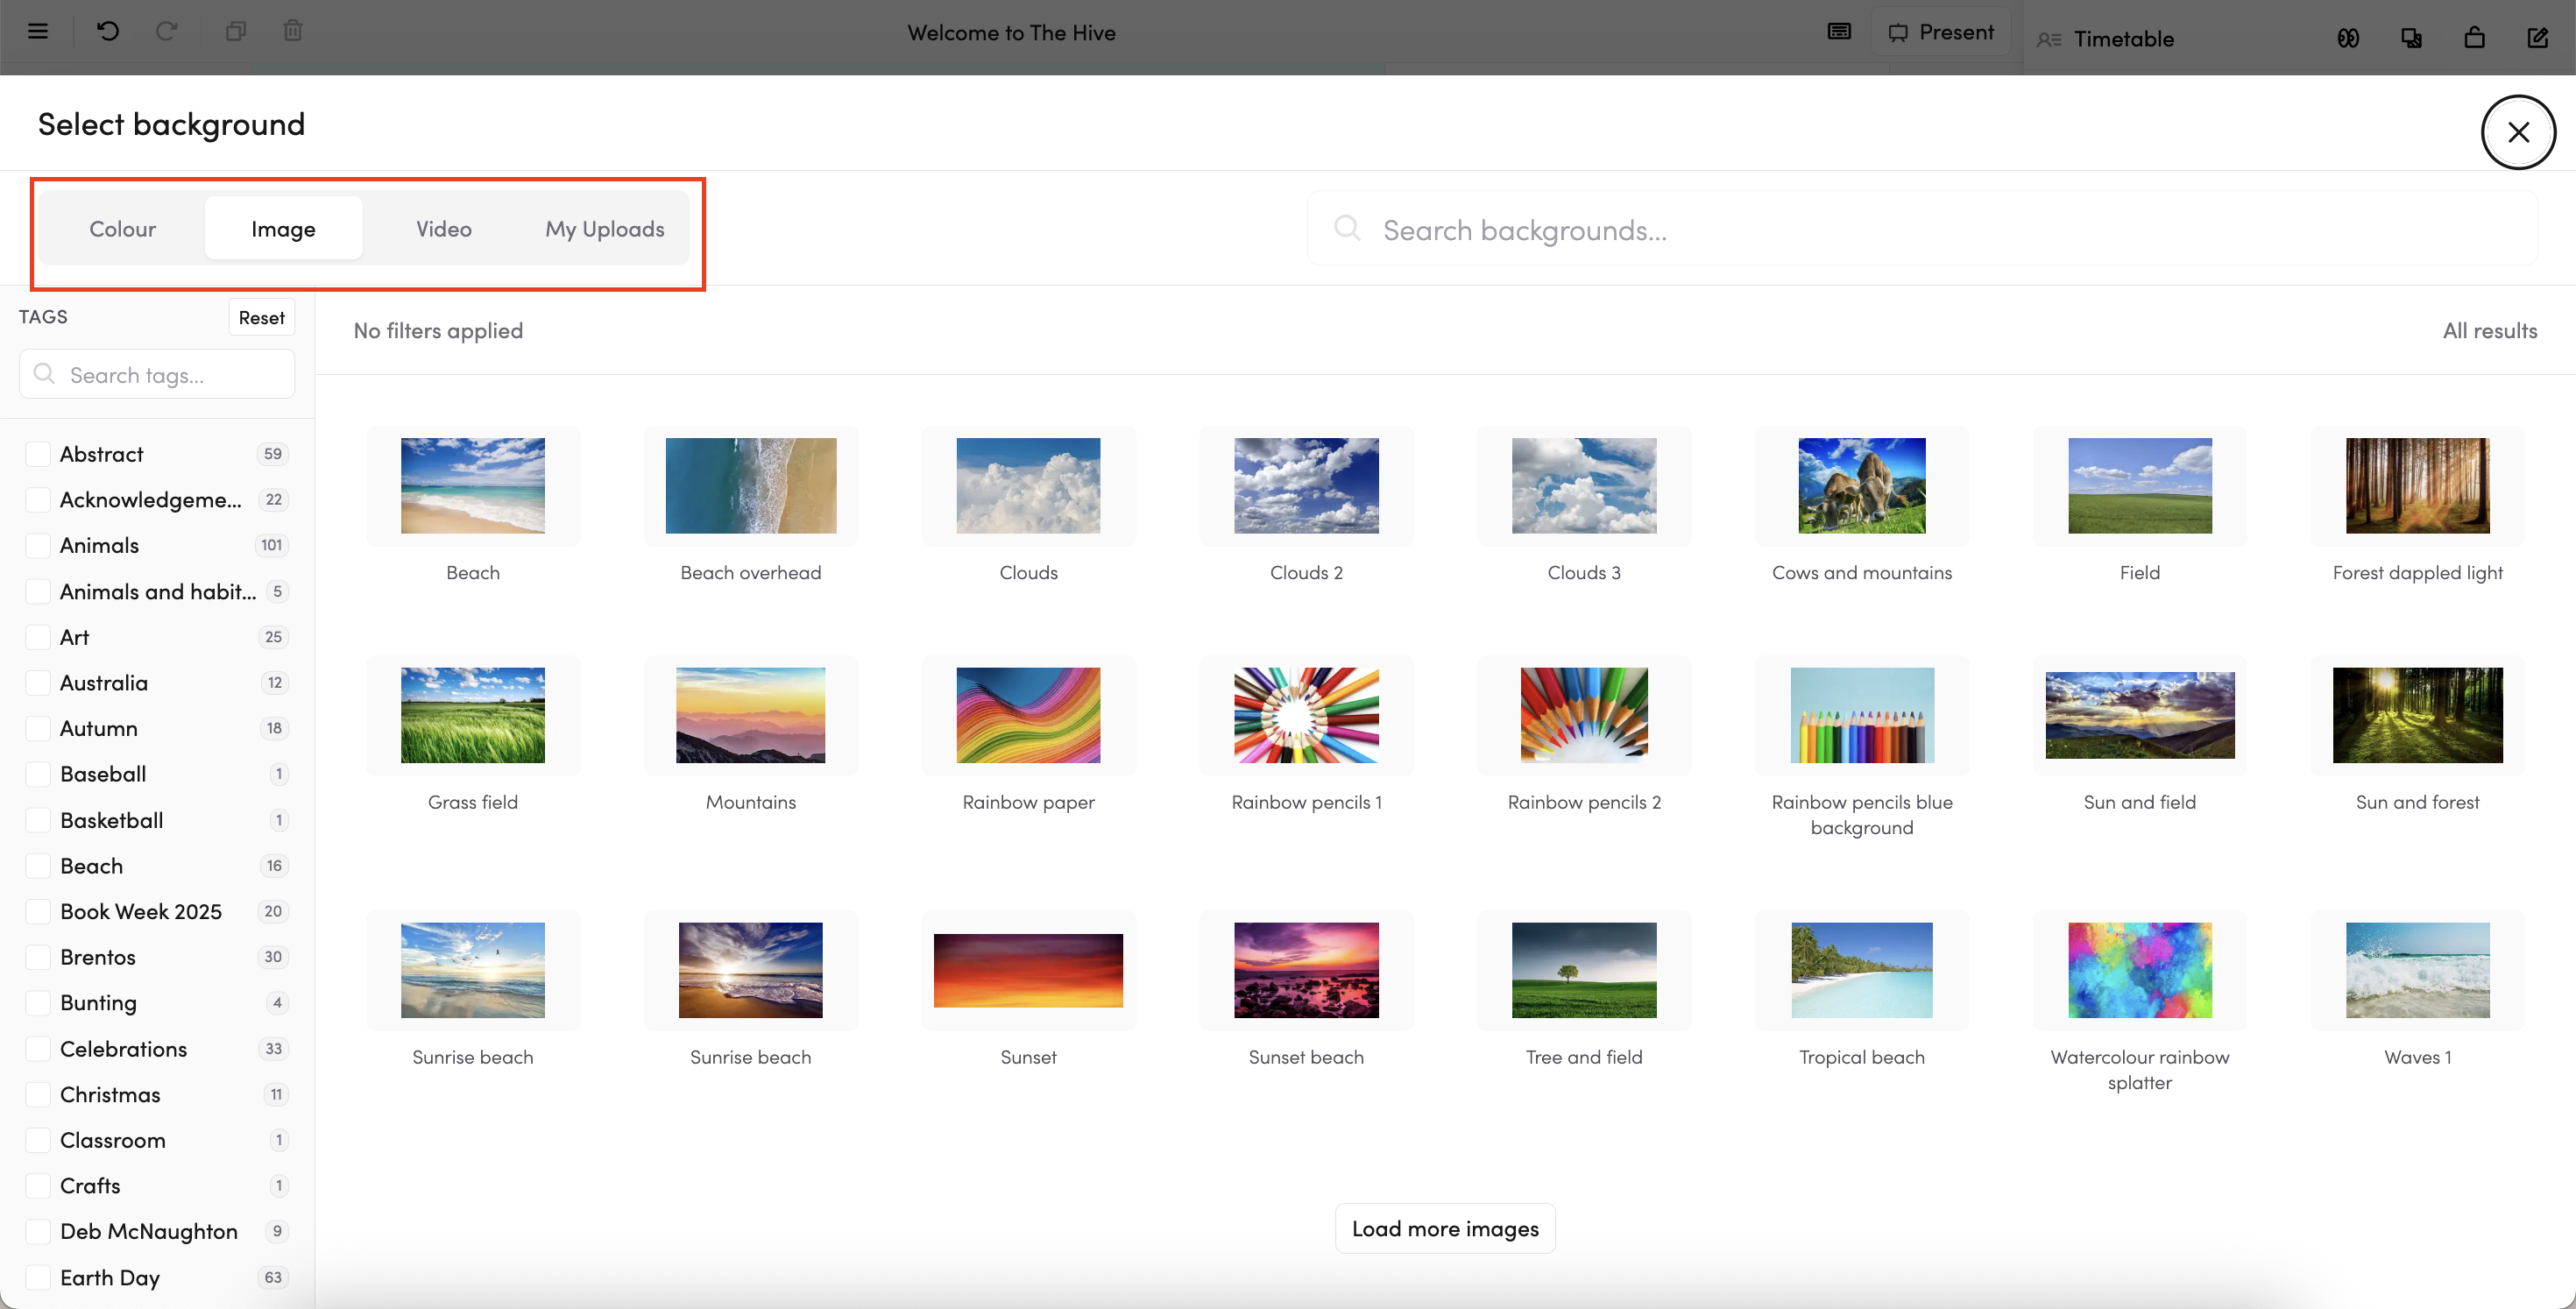
- You can choose from four types of background:
- Colour — pick a solid colour from the colour palette
- Image — browse from the built-in image library, or search by keyword. Use the tags on the left to filter by category.
- Video — choose a video background from the library
- My Uploads — use an image you've uploaded yourself
- Use theme colour — turn this on to apply your deck's theme colour as the background. When it's on, the Choose option is disabled — turn it off first to set a custom background.
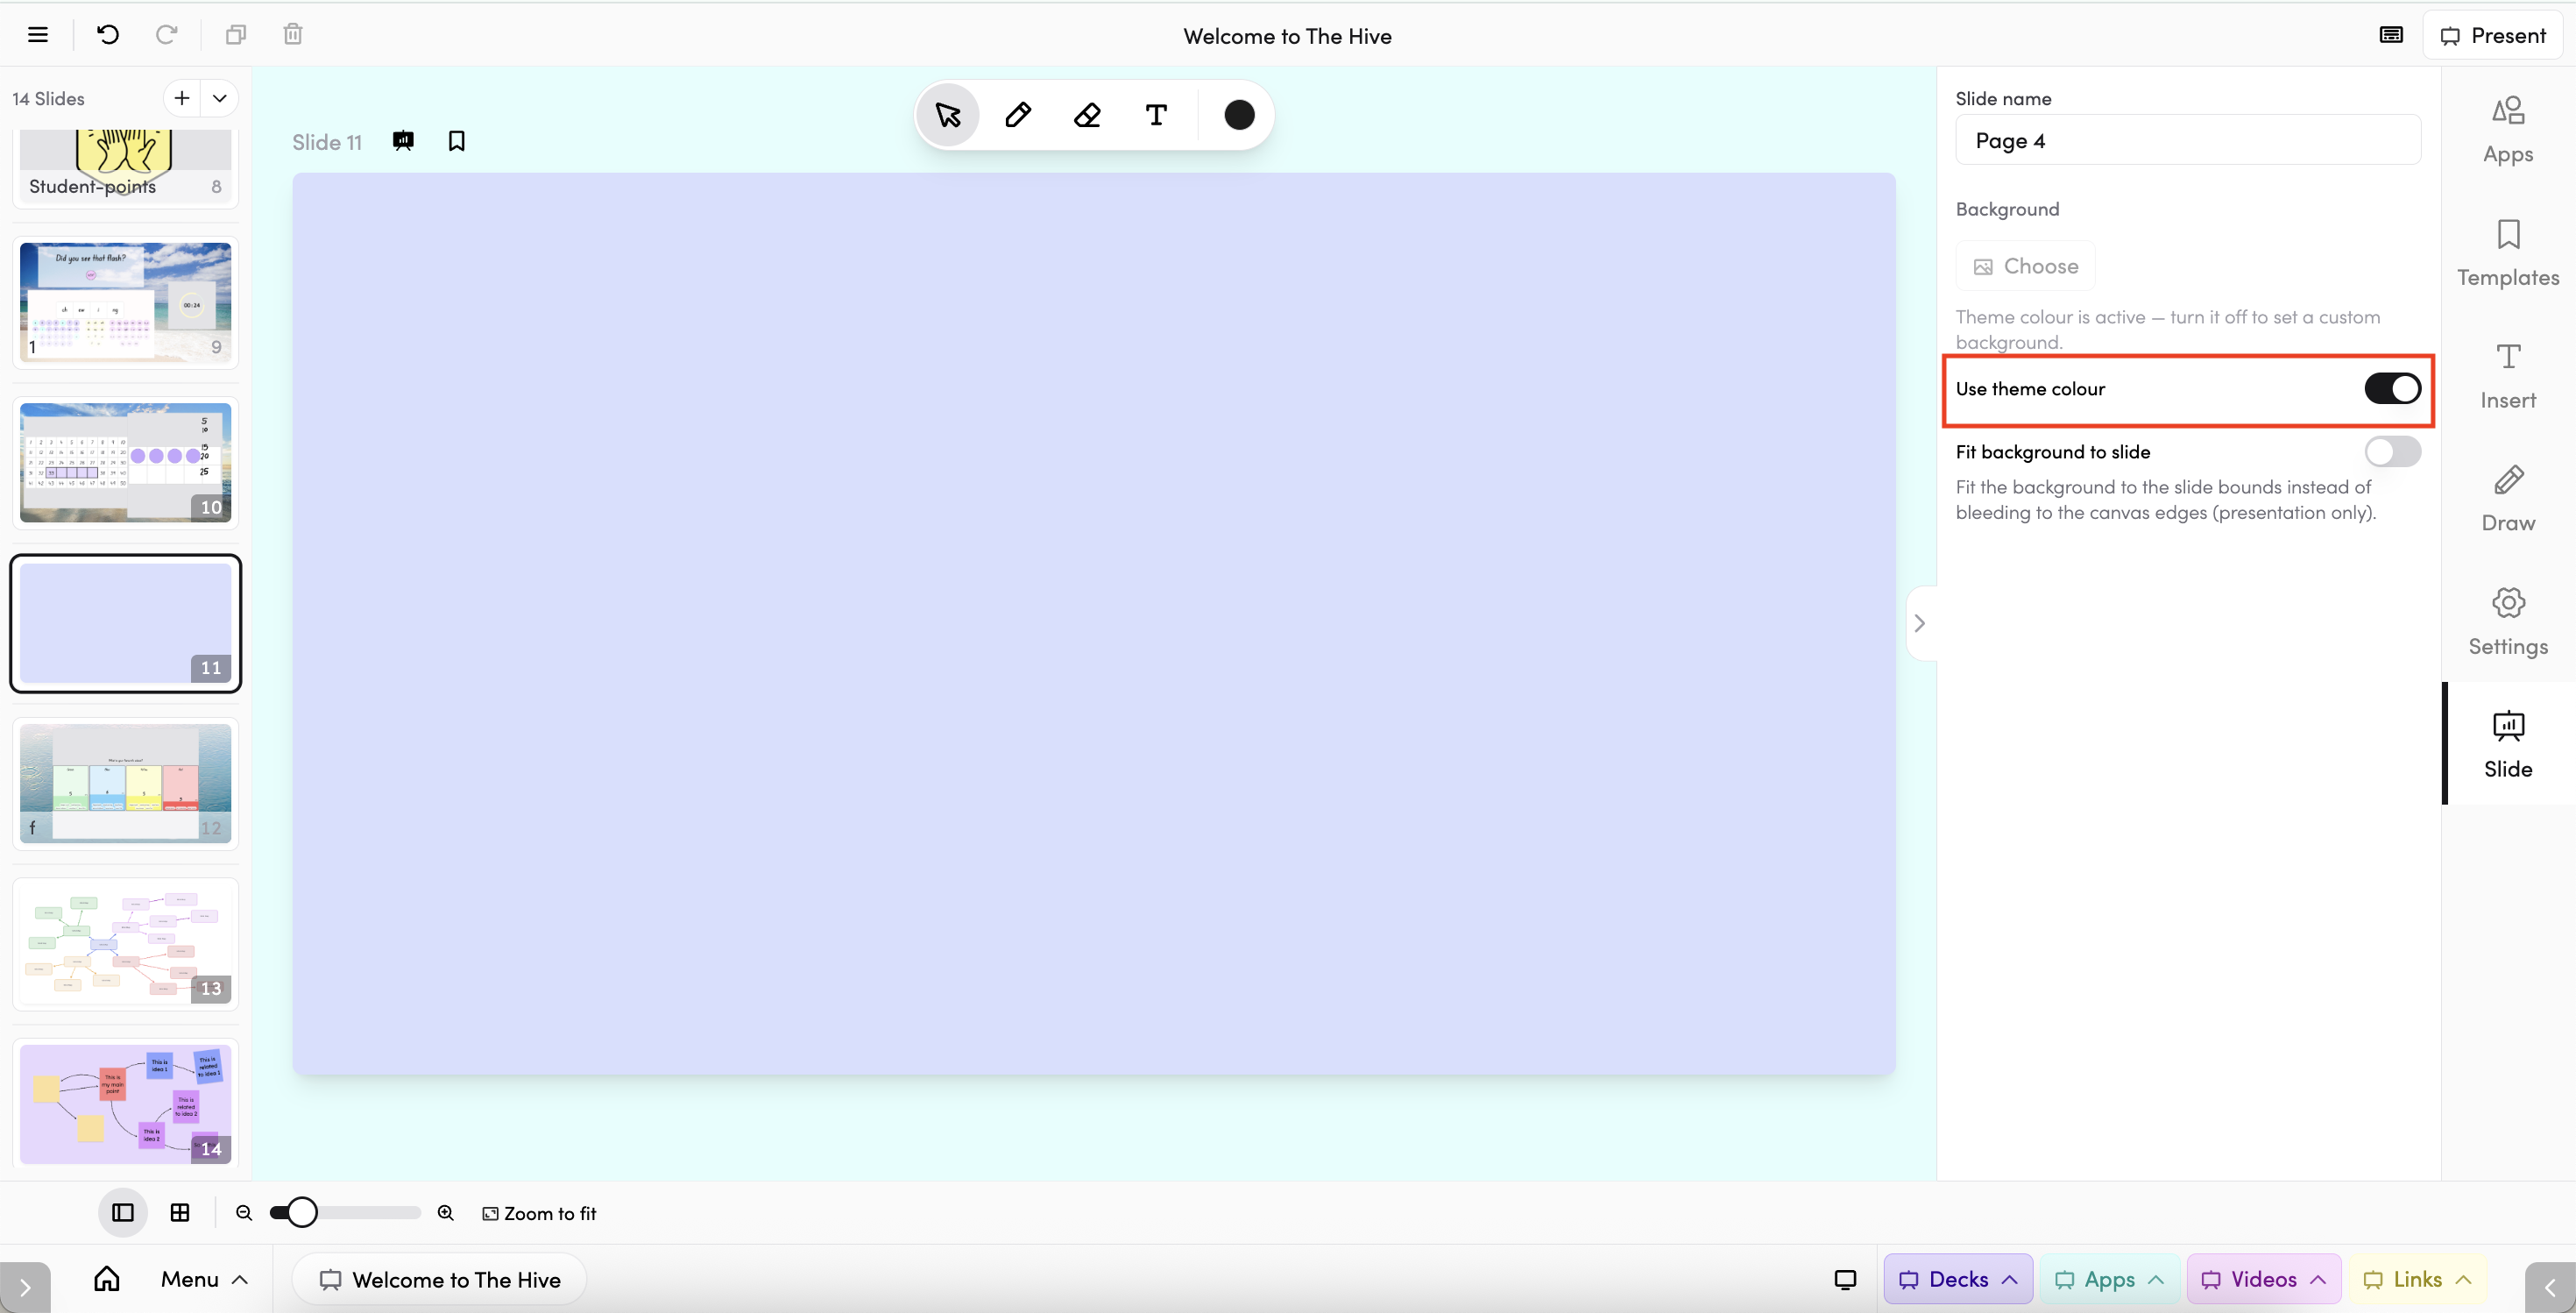
- Fit background to slide — turn this on if you want the background image or video to stay within the slide canvas when presenting. When it's off, the background extends to fill the full screen.


Once a background is applied, you'll see Change and Clear buttons in the panel to swap or remove it.
Presenting your slides
When you're ready to present, click the Present button in the top bar. Your slides will fill the available space with a simple navigation bar at the bottom.
- To move between slides: use left and right arrow keys or click the centre buttons in the navigation toolbar. On a touch-enabled device, swipe zones are available to the left and right of the central buttons for quick navigation no matter which side of the IWB you're standing on.
- Press Escape or click Exit to return to the editor
- Any apps on your slides remain interactive during the presentation

You can move objects around, draw, highlight, use laser, and erase objects in presentation mode
Saving and syncing
Your work saves automatically as you edit. The slides editor uses real-time syncing, so your changes are always up to date.
Undo and redo work within the current session — if you leave the editor and come back, you won't be able to undo previous changes.
Tips for getting started
- Explore the sidebar tabs: Each tab (Apps, Templates, Insert, Draw) opens up a different set of tools — take a moment to browse them all
- Use keyboard shortcuts: Shift+A, Shift+T, Shift+I, and Shift+D quickly open each sidebar tab.
- Try templates: Save time by starting slides from pre-made templates rather than building from scratch. Templates can be as small as a nicely formatted text box or as complete as a fully-fledged slide — you can add your own too
- Lock objects: Right-click or use the floating toolbar to lock objects in place so you don't accidentally move them
- Use Ctrl+Z freely: Undo and redo are unlimited within the current session, so experiment without worry
- Present often: Use the Play button to preview how your slides look in presentation mode as you build them
Coming from the old slides editor?
The new editor is a significant upgrade. Here are the key differences:
- More intuitive and richer text formatting: Full control over fonts, sizes, colours, alignment, backgrounds, borders, and scaling on text
- All apps: Embed every interactive app directly in your slides, not just a handful
- Works on any screen size: Content stays in place regardless of screen dimensions (no jumping around when moving from laptop to IWB)
- Better object manipulation: Full control over size, scale, and rotation, ability to multi-select, group and align objects, and more.
- Templates: Save and reuse your own slide designs as templates
- Importing: Import slides from any other deck
- Drawing tools: Pencil, shapes, arrows, highlighter, and laser pointer built right in
- Video support: Add videos as foreground objects or as slide backgrounds
- Tables: Insert editable tables with rich text cells
- Presentation mode: A dedicated mode with keyboard and touch navigation, whilst maintaining app interactivity.
Need help?
Browse the other help articles in this section for detailed guides on each feature, or contact us through the help widget at the bottom of the left navigation menu.