Getting started with Student Trackers
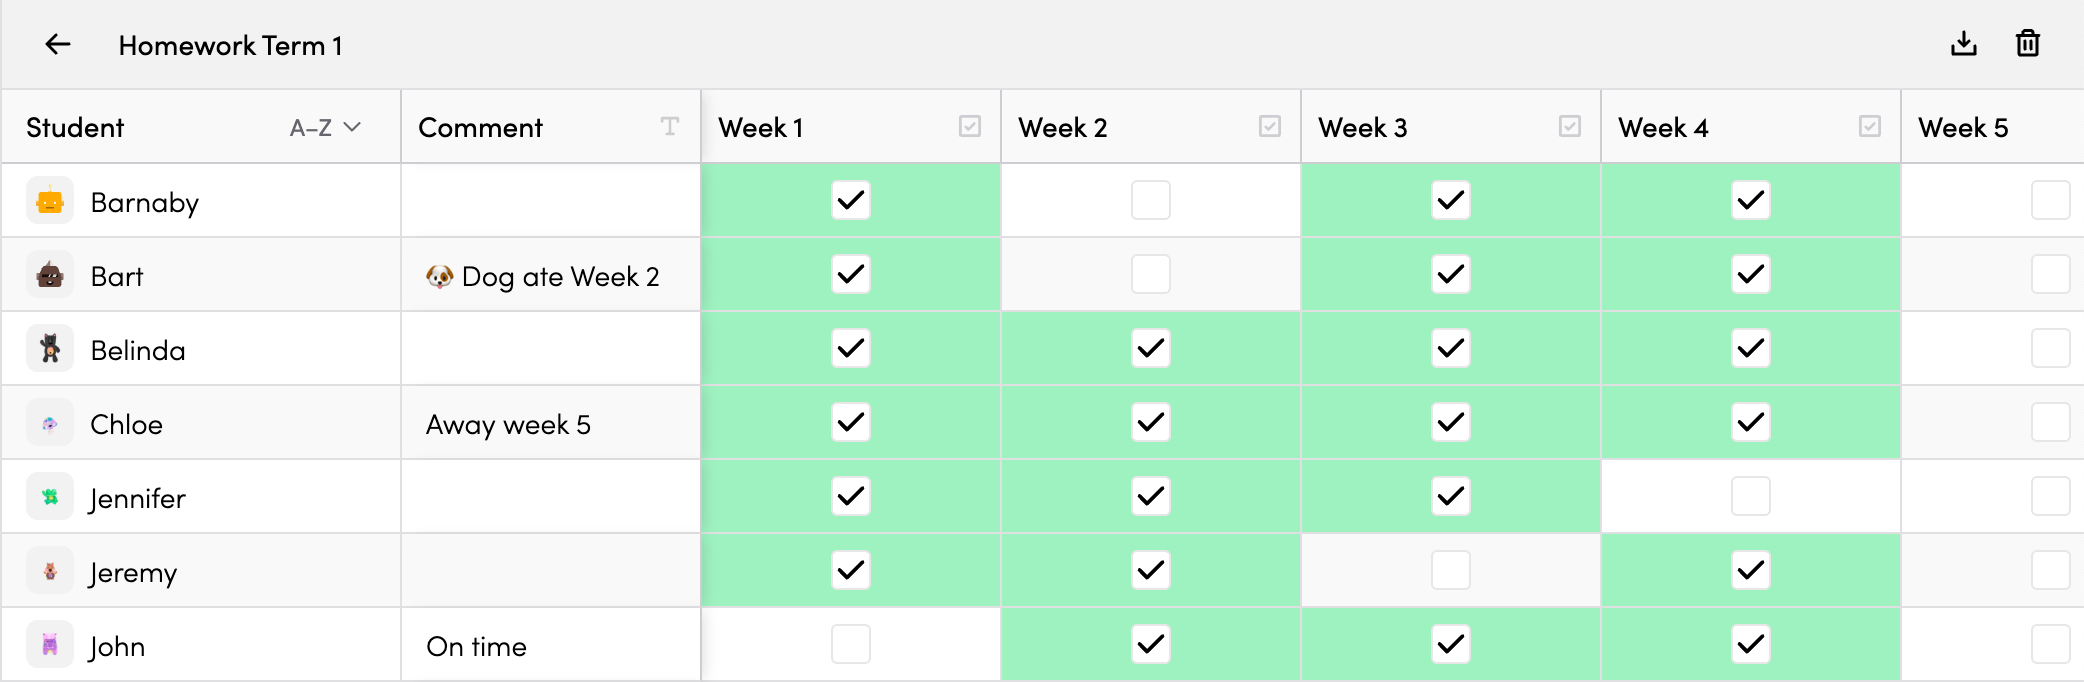
Student Trackers help you keep track of student progress, behaviours, skills, or any other data you want to monitor across your class. Think of them as customisable spreadsheets tailored for your classroom needs.
What you can track
Use trackers for things like:
- Reading levels or assessment scores
- Homework completion
- Behaviour points
- Skill mastery checkboxes
- Book club groups or other student groupings
- Anything else you want to monitor!
Before you get started
For Trackers to be used, you must have aready:
- Created a class
- Added your students to that class
Accessing Student Trackers
There are two ways to access your trackers:
From the Class Manager
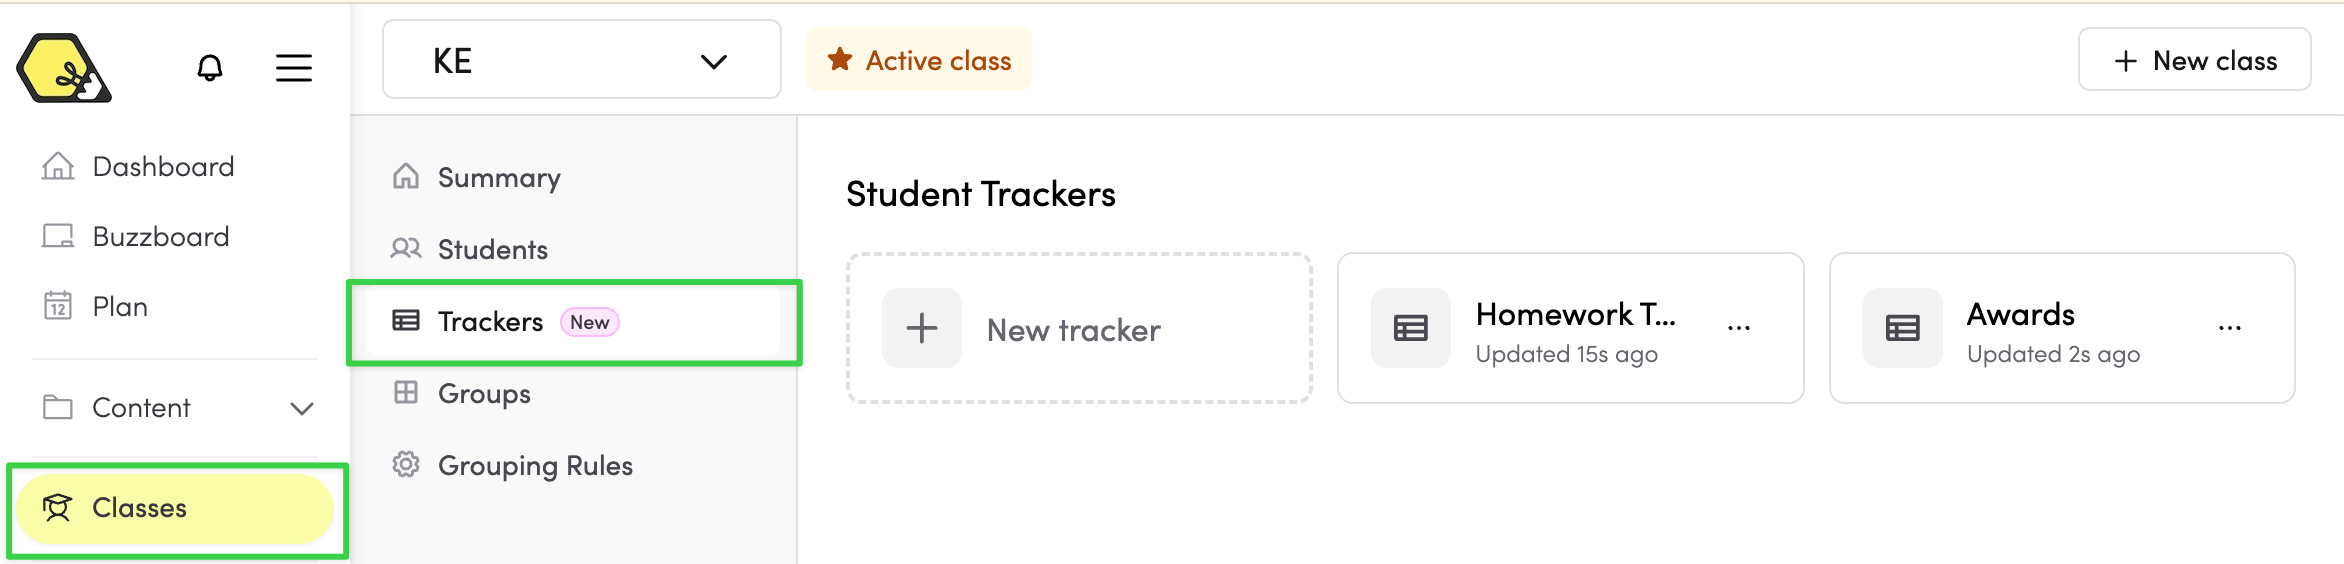
Navigate to your class in the Class Manager and select the Trackers tab.
From the planner
Click the Trackers button in your plan view to open the tracker dialog.

Creating your first Tracker
- Open the Student Trackers dialog or navigate to the Trackers tab
-
Click the New tracker card

-
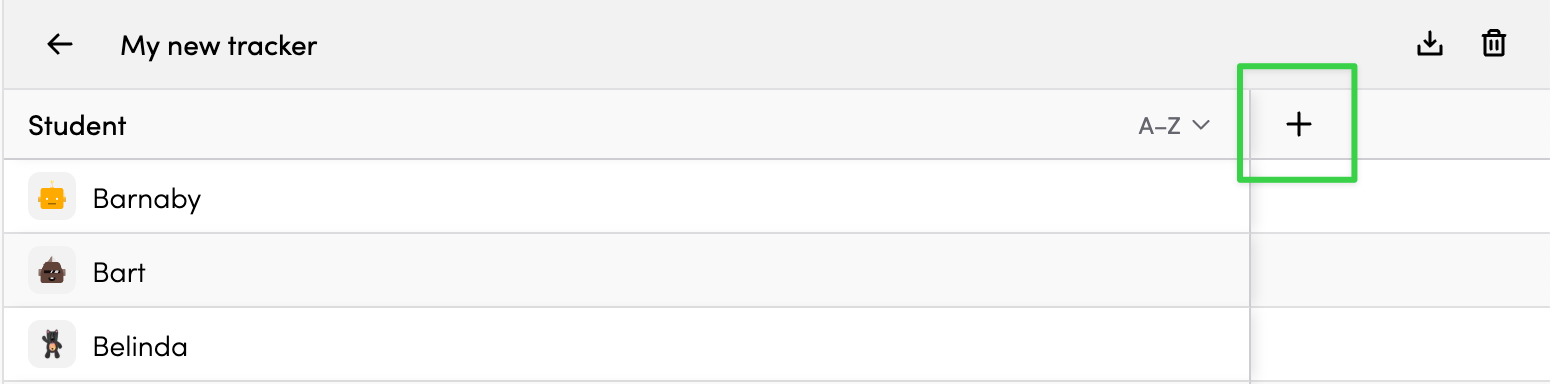
Your new tracker opens with the title selected - type a name for it (e.g., "Reading Levels" or "Homework Tracker")


Adding columns
Columns define what data you want to track. Click the + button in the header row to add a new column.
Column types
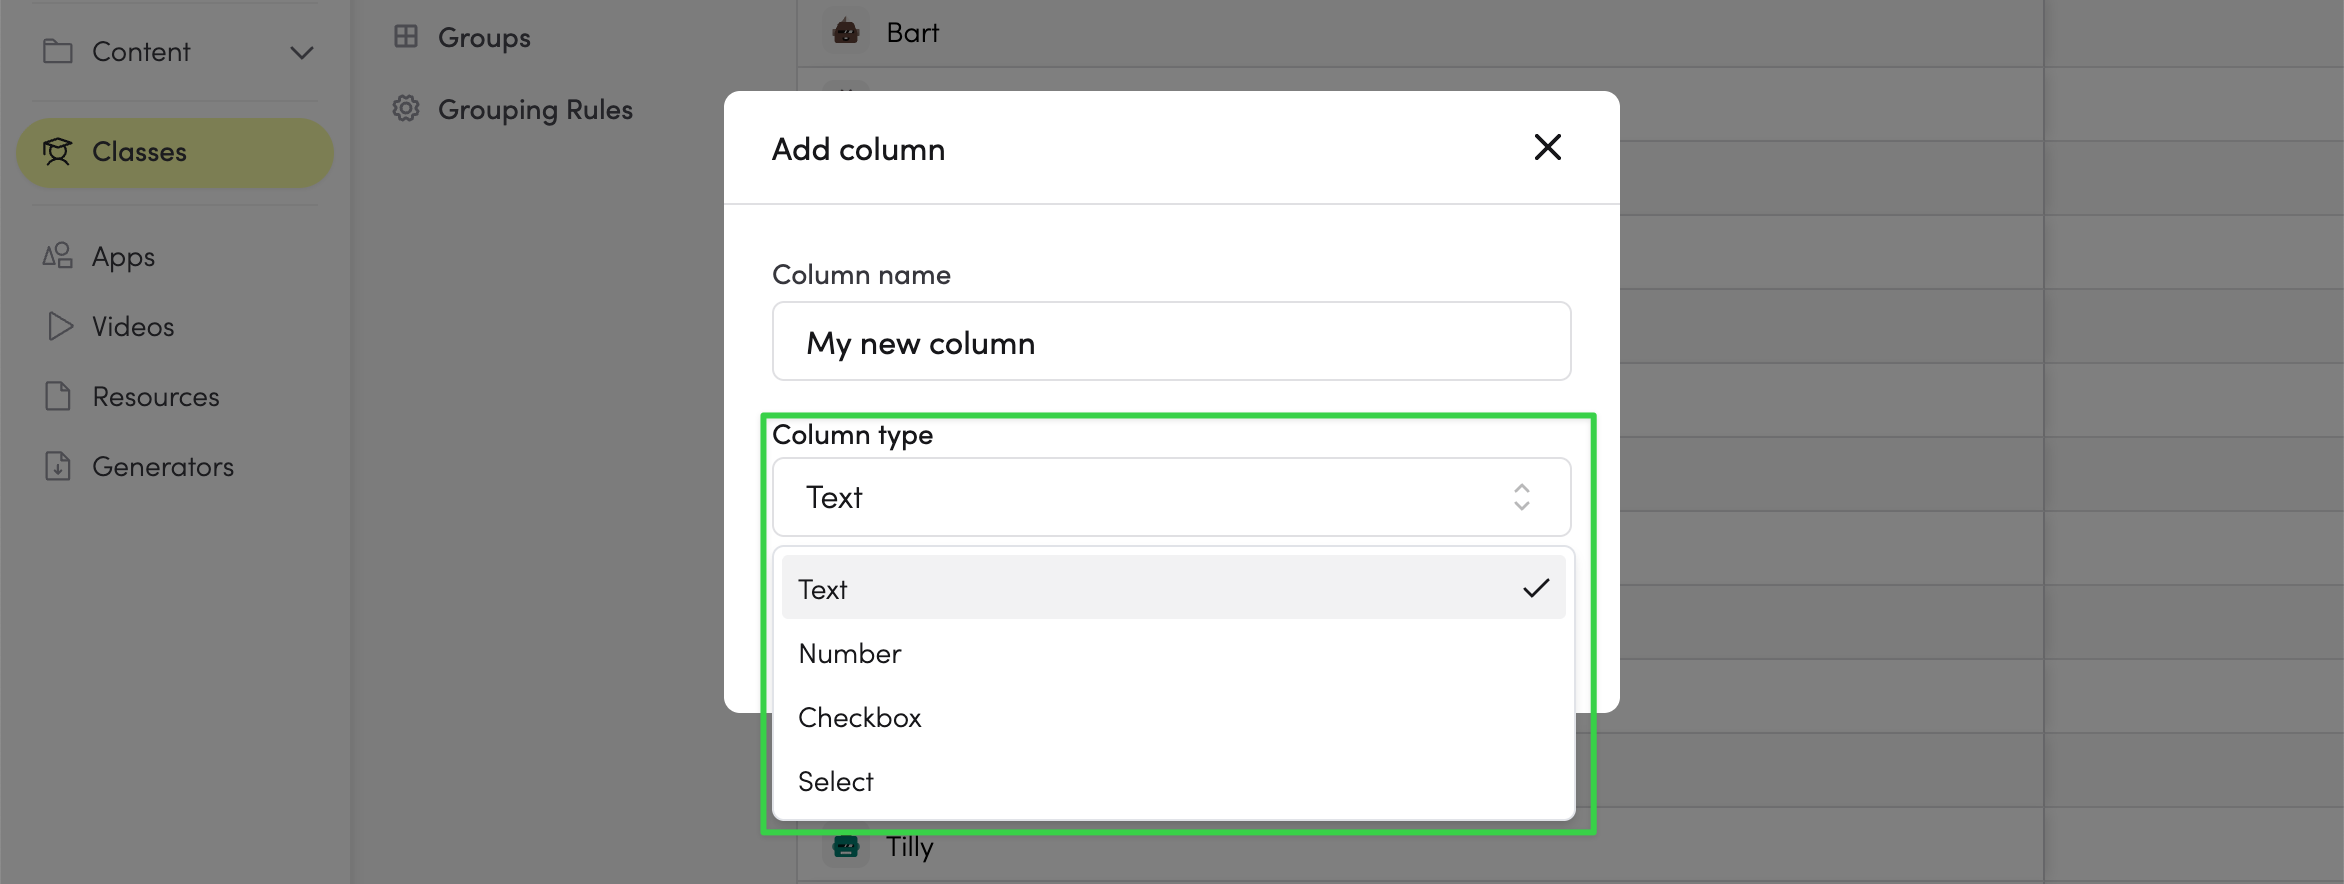
Choose from four column types:
| Type | Best for | Example |
|---|---|---|
| Checkbox | Yes/no tracking | Homework submitted, permission slip returned |
| Text | Short notes or labels | Comments |
| Number | Scores or counts | Test scores, behaviour points |
| Select | Predefined options | Working at/above/below |
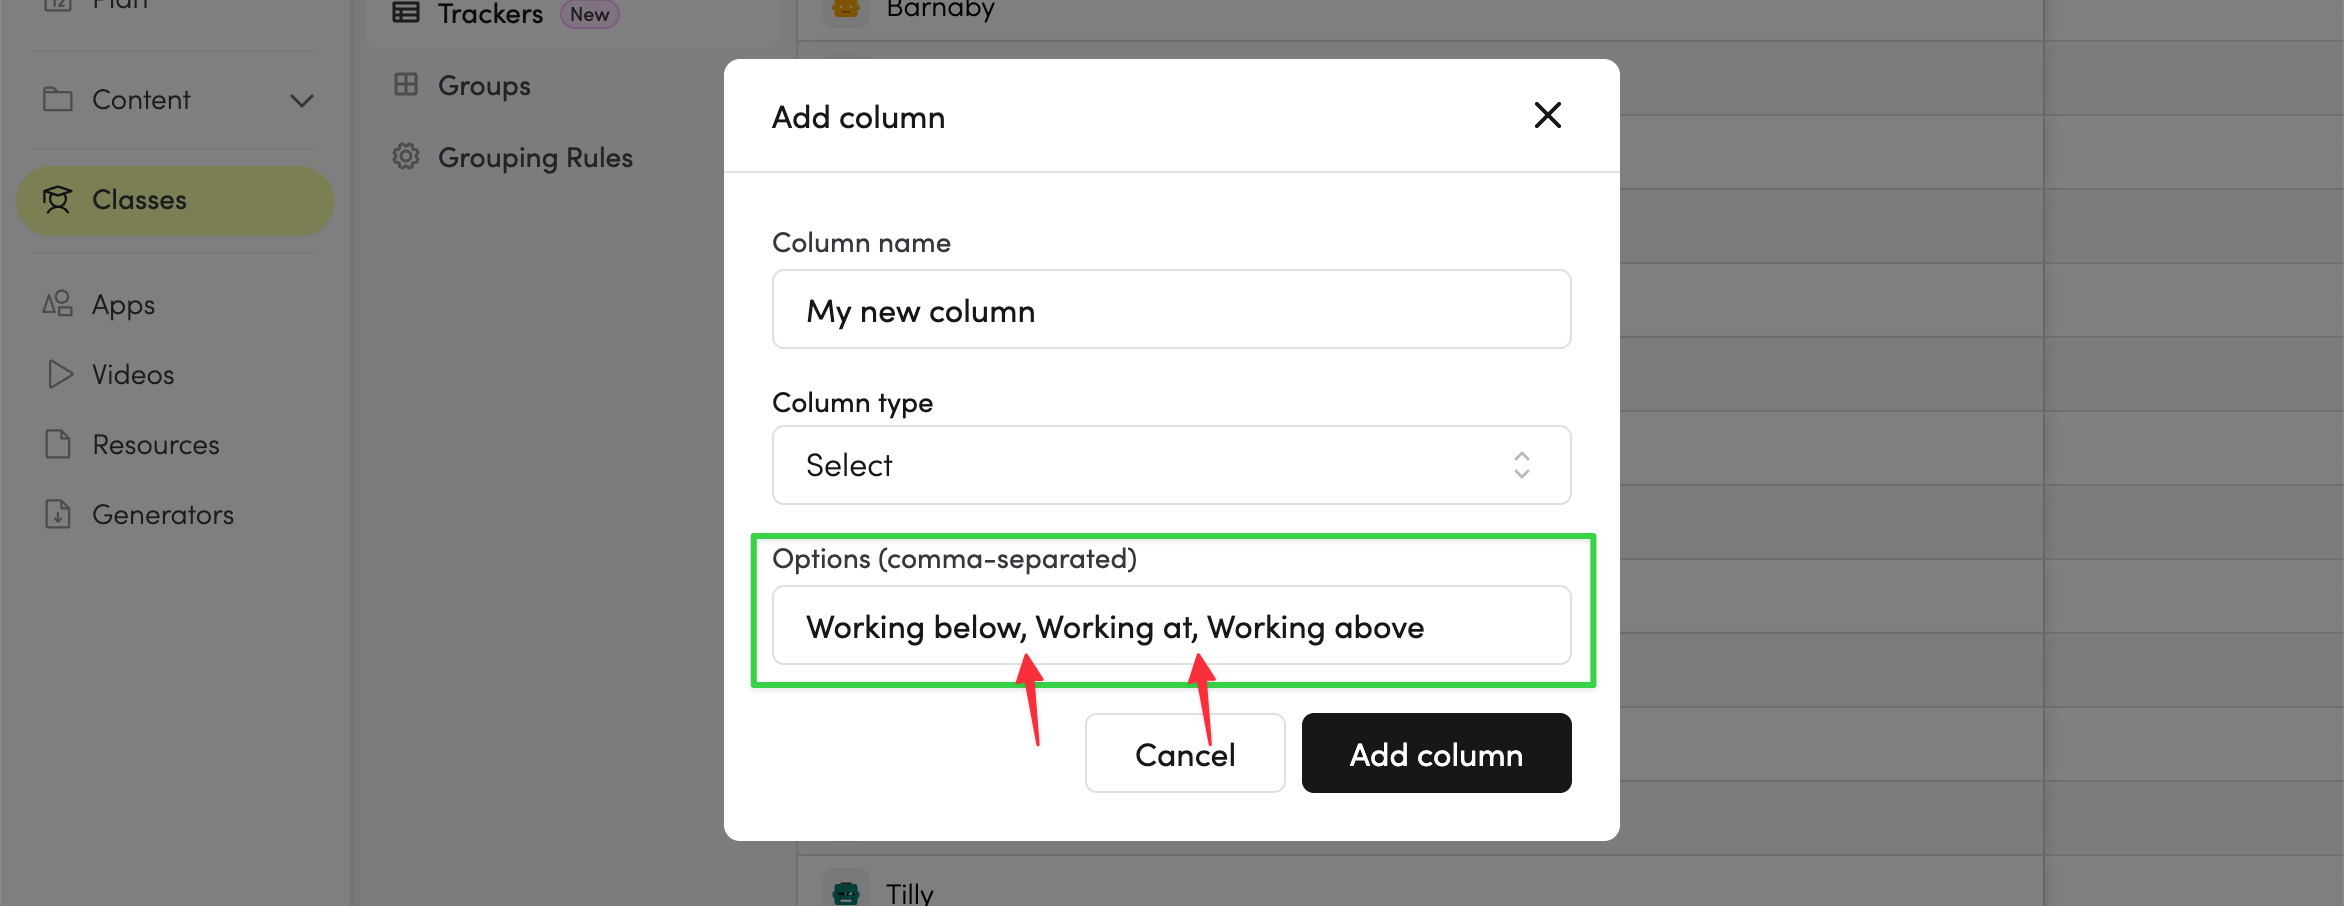
Setting up a Select Column
For Select columns, enter your options separated by commas:
Entering data
Click on any cell to enter or edit data:
- Checkbox: Click to check/uncheck
- Text: Double-click to edit, or press Enter/Space when focused
- Number: Double-click to edit, or press Enter/Space when focused
- Select: Click and choose from your options

Keyboard Navigation
Navigate through your tracker like a spreadsheet using your keyboard:
| Key | Action |
|---|---|
| Arrow keys | Move between cells |
| Enter or space | Enter edit mode (text/number cells), toggle checkbox or open select options |
| Escape | Cancel editing and return to navigation mode (when editing text/number cell) |
| Enter (while editing) | Save changes and move to next cell down (text/number cells) |
| Tab | Move to cell down, wraps to next column when you reach the bottom |
| Shift + tab | Move to cell above, wraps to previous column when you reach the top |
Managing columns
Click on any column header to access column options:
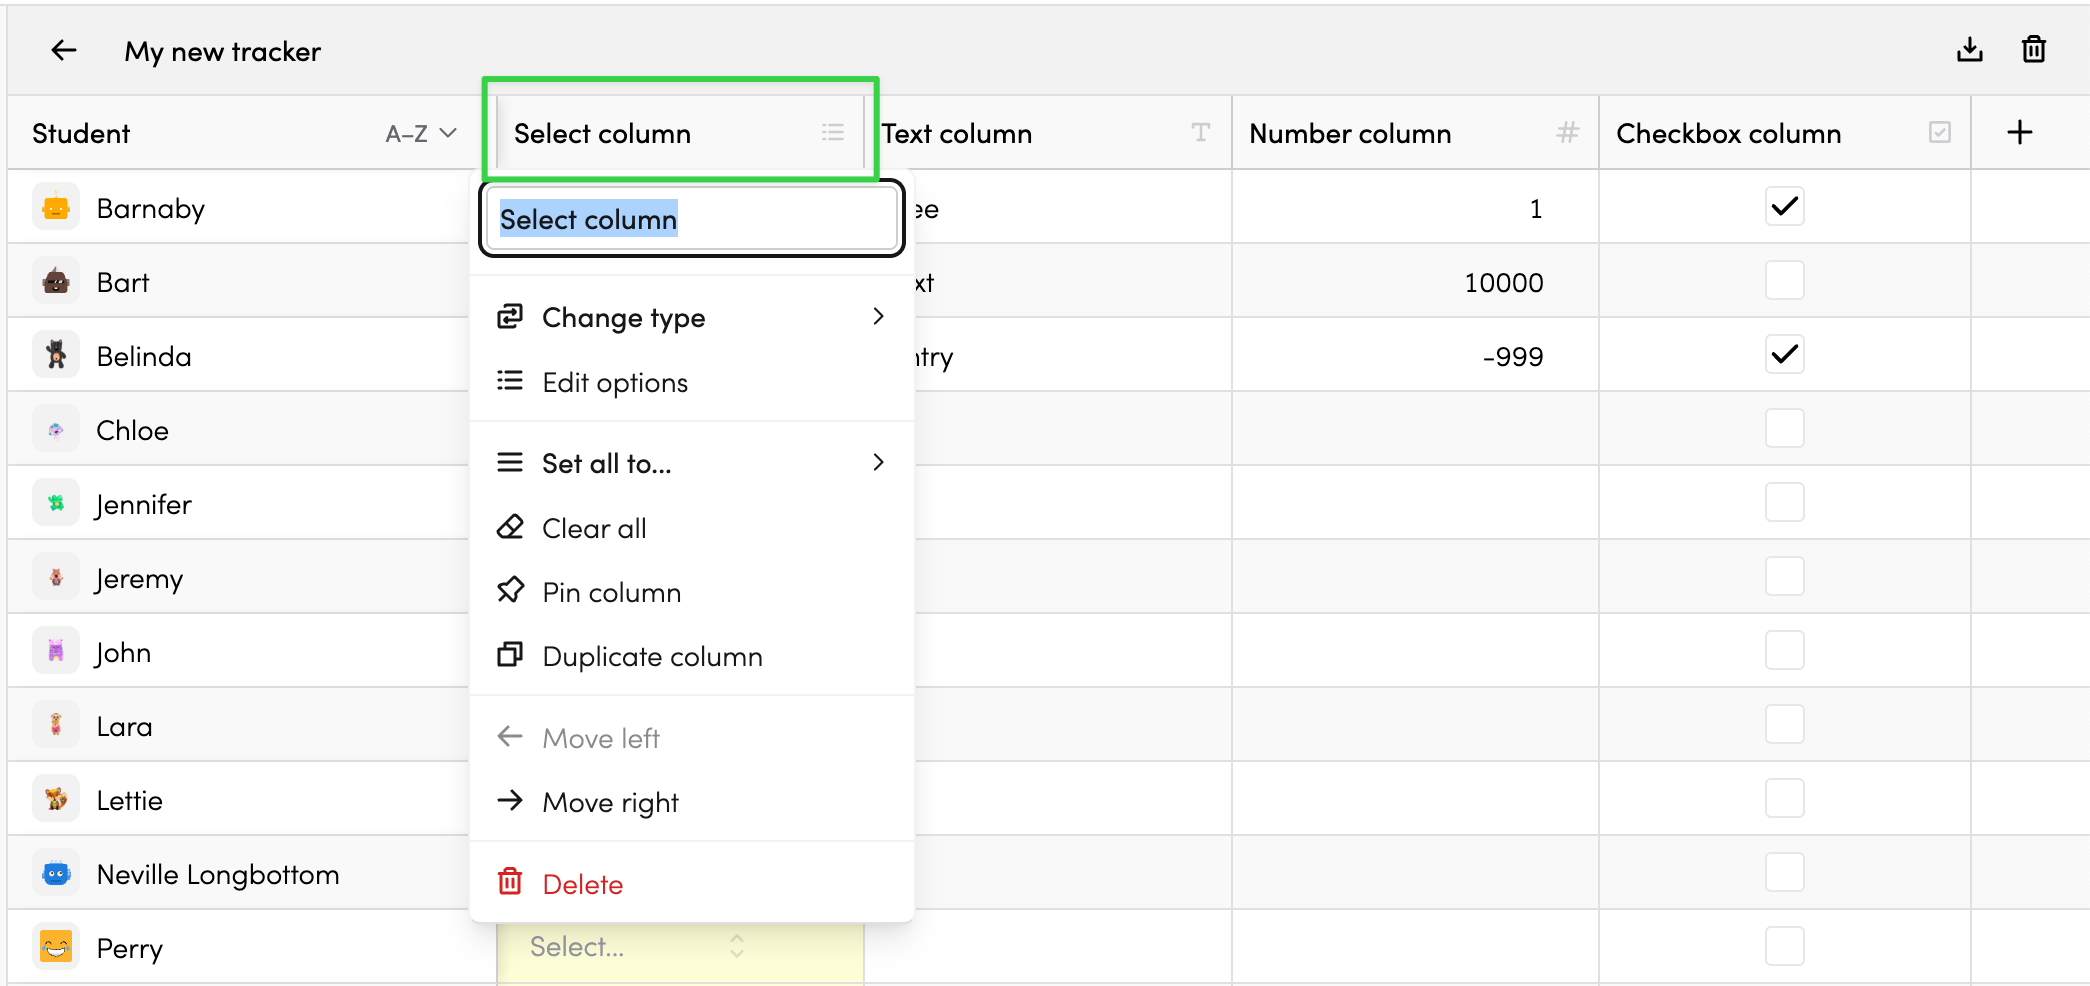
Column options
- Rename: Edit the column name at the top of the menu
- Change type: Switch between column types (your previous data for each type is preserved if you switch back)
- Edit options: Change the supported options for a select column type
- Column settings: Checkbox, select, and number columns support automatic background colours - adjust those colours here. Also allows controlling minimum/maximum values for number cells.
- Pin column: Keep the column visible while scrolling horizontally
- Duplicate column: Create a copy of the column (with or without data)
- Move left/right: Reorder columns
- Delete: Remove the column and its data
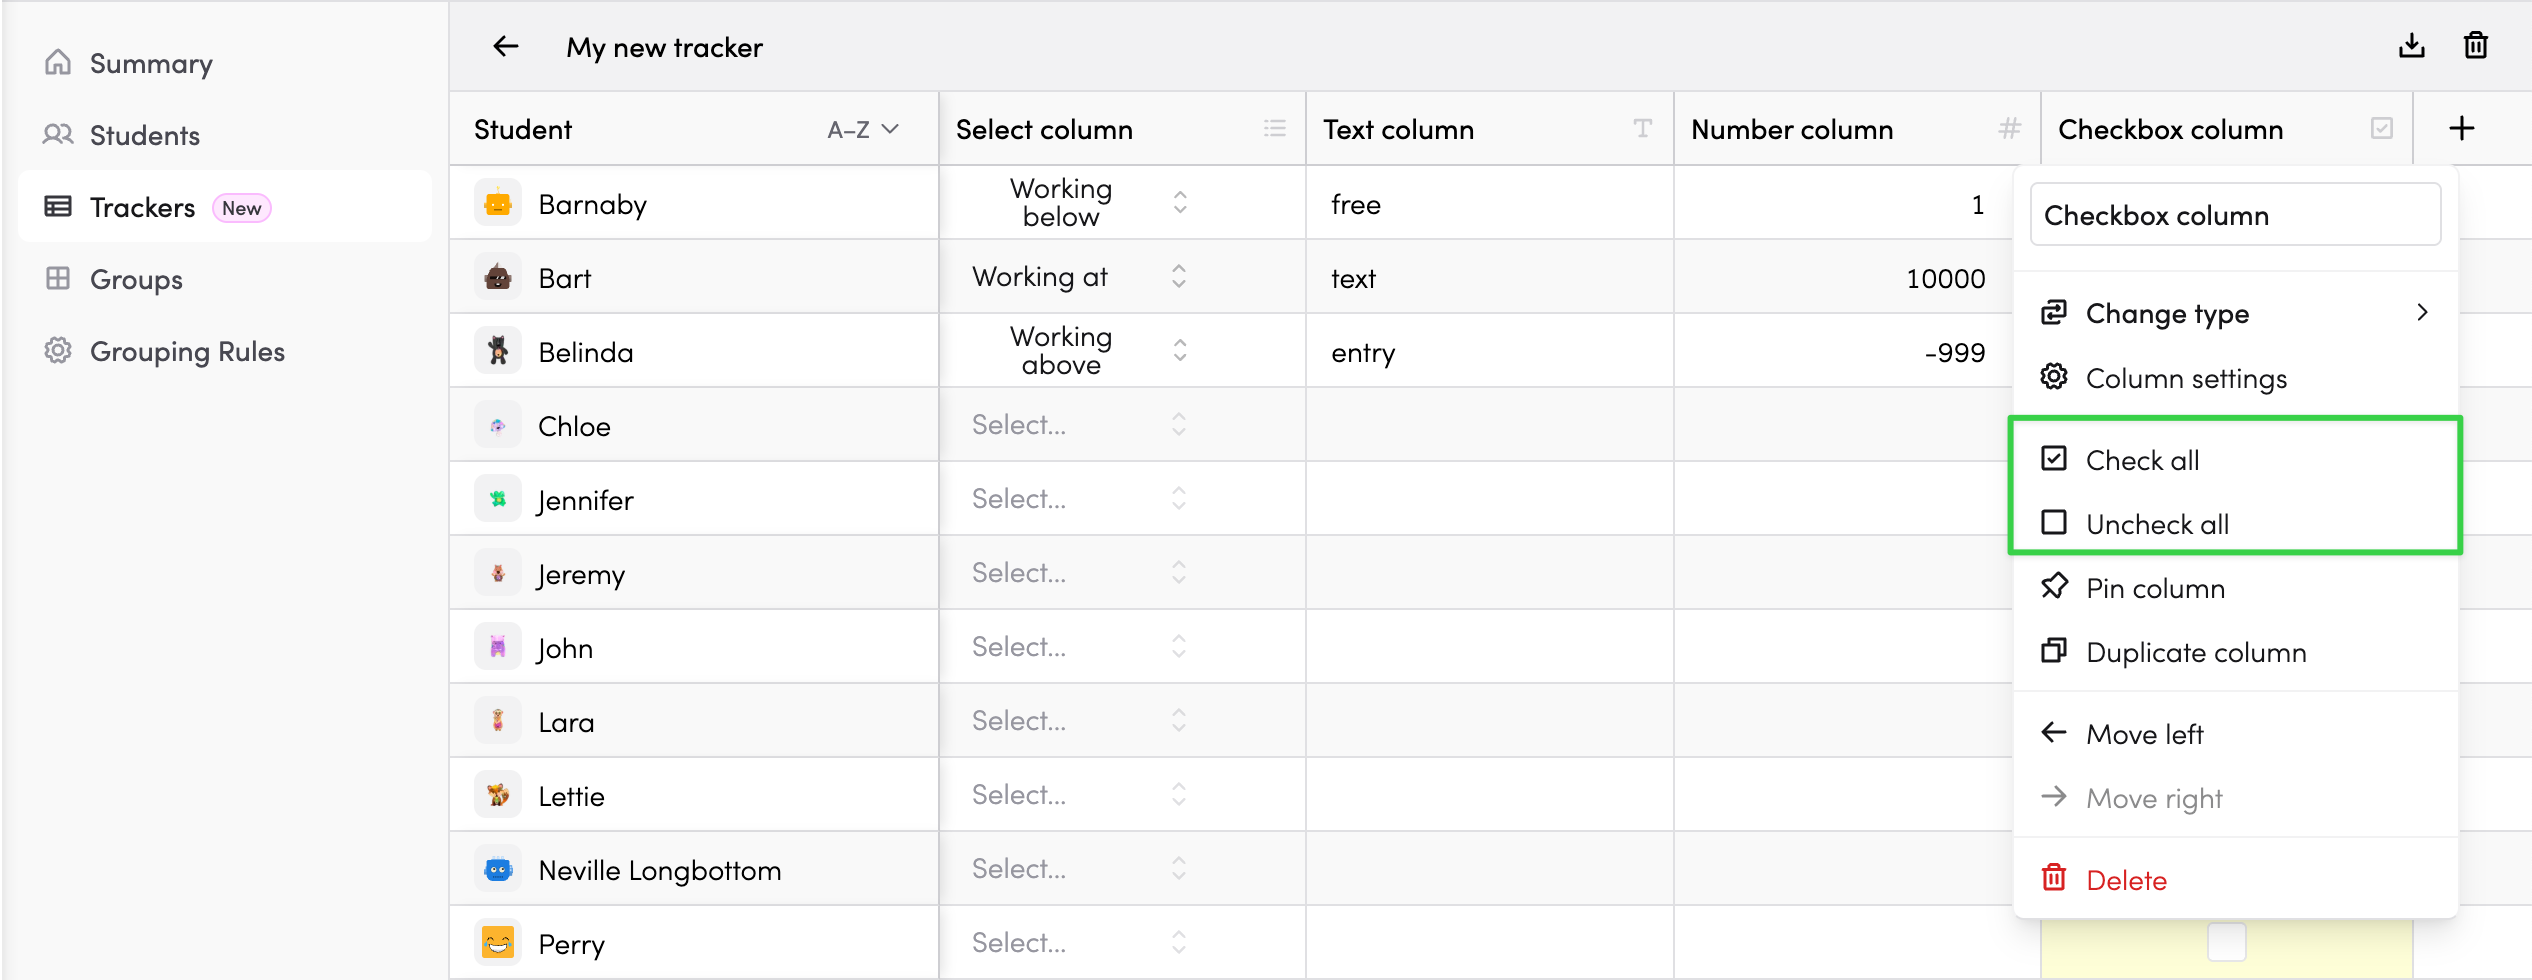
Bulk actions
Quickly update all cells in a column:
- Checkbox columns: "Check all" or "Uncheck all"
- Select columns: "Set all to..." with your options
- All types: "Clear all" to reset values
Column summaries
Add summary calculations to Number and Checkbox columns to see totals, averages, or counts at a glance.
Adding a summary
- Click on a Number or Checkbox column header
- In the Σ Summary dropdown, select your calculation type
- The summary appears in the footer row
Summary types
| Column type | Summary options |
|---|---|
| Number | Total (sum of all values), Average (mean of all values) |
| Checkbox | Count (checked/total), Percent (percentage checked) |
Summaries in exports
When you export your tracker to CSV, any column summaries are included as the final row of the spreadsheet. This makes it easy to share summary statistics along with your data.
Sorting students
Click the sort dropdown in the Student column header to change the order:
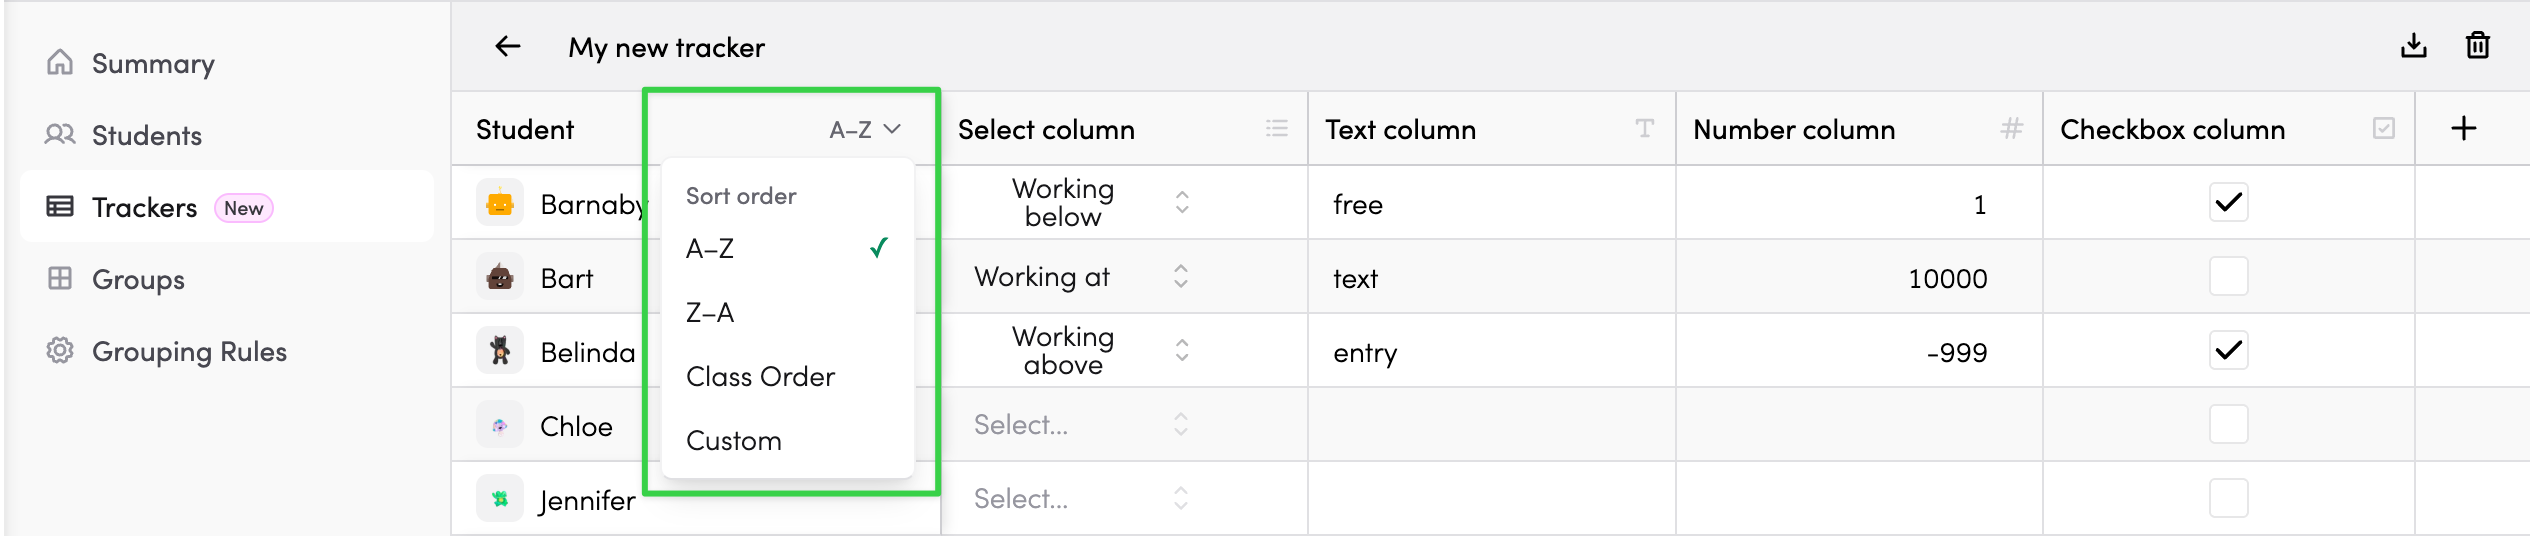
| Sort option | Description |
| A-Z | Alphabetical by student name |
| Z-A | Reverse alphabetical |
| Class order | Use the manual order you set for your class |
| Custom | Override and create your own order, just for this Tracker |
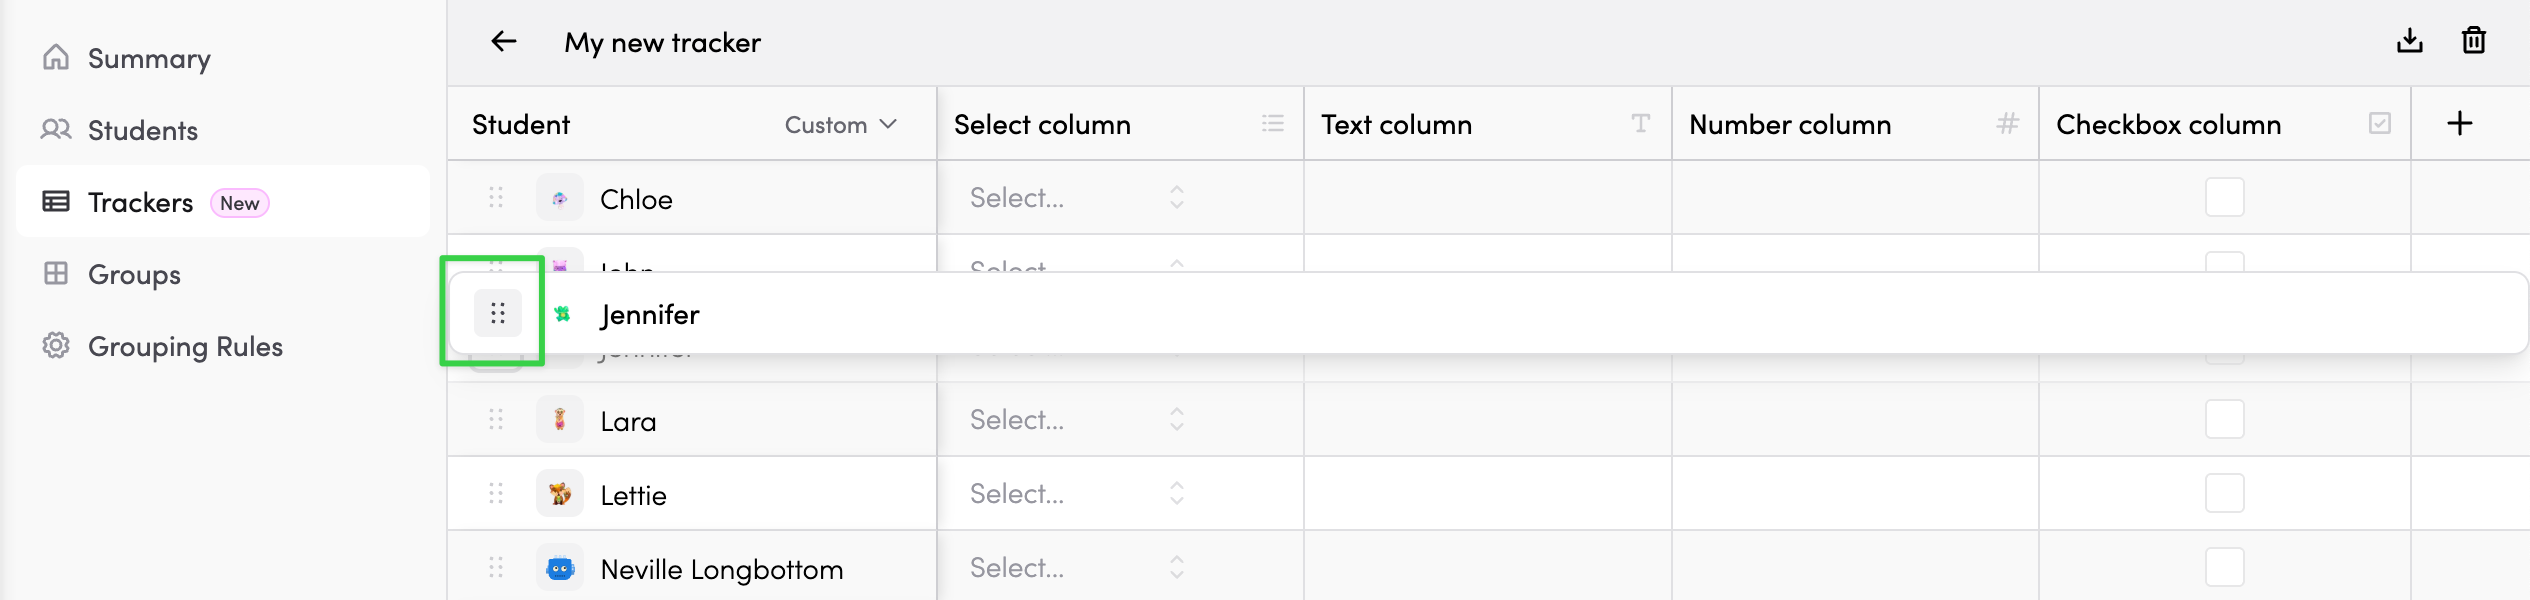
Custom ordering
When using Custom sort, drag handles appear next to student names. Drag students to reorder them:
Pinning columns
Pin important columns to keep them visible while scrolling through many columns:
- Click the column header
- Select Pin column
Pinned columns stay fixed on the left side of the table.

To unpin, click the column header and select Unpin column.
Maximising your View
Pinning columns reduces the available width for viewing other columns. To give yourself more room:
- Collapse the left navigation menu
- Close the right slide-out timetable if it's open
- Use the full-screen mode button (bottom of left navigation menu) for maximum space
- Zoom out your browser
Working with removed students
When a student leaves your class, their row is marked as "removed" but their data is preserved.
Click Show removed students to view them, or Hide removed students to focus on current students.
Exporting your data
Export your tracker data as a CSV file (spreadsheet) to use in other applications or for reporting.
Click the download icon in the tracker toolbar:

The CSV file will include all visible students and columns.
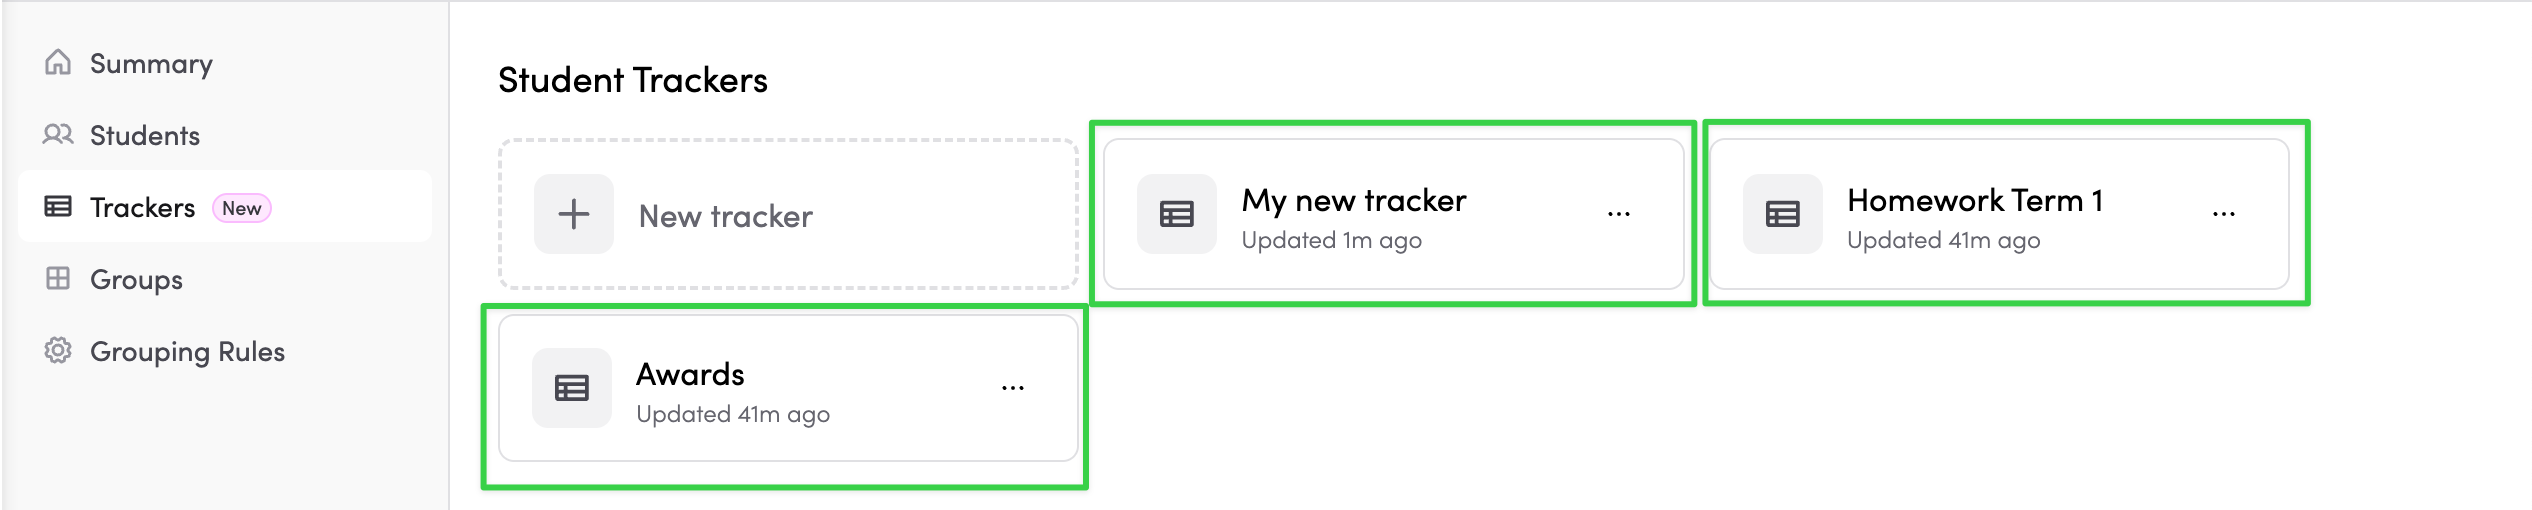
Managing multiple trackers
Create as many trackers as you need for different purposes:
- Assessment tracker
- Behaviour tracker
- Reading groups tracker
- Project completion tracker
Each tracker is independent and can have its own columns and sorting.
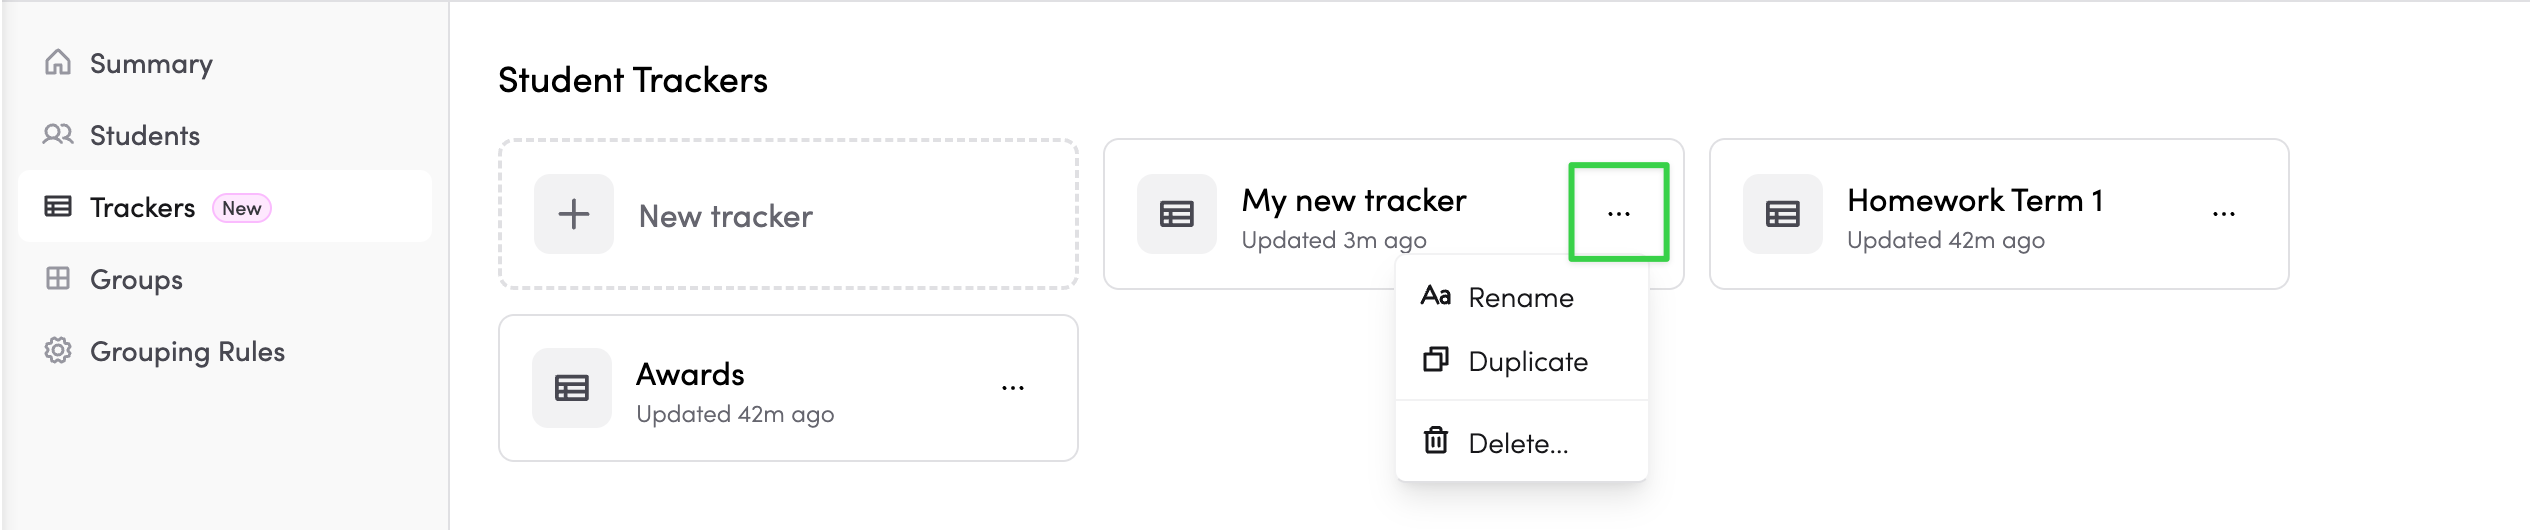
Tracker Actions
Click the ... menu on any tracker card to:
- Rename the tracker
- Duplicate to create a copy
- Delete the tracker
Tips for success
- Start simple: Begin with one or two columns and add more as needed
- Use descriptive names: Name your trackers and columns clearly so they're easy to find
- Pin key columns: Pin your most-used columns so they're always visible
- Export as needed: Download backups of important tracking data
- Use bulk actions: Save time by using "Check all" or "Set all to" for common updates
- Use keyboard navigation: Arrow keys to move between cells, Enter to edit - much faster than clicking!
- Share your feedback: Student Trackers are new and we'd love to hear from you! Let us know what's working well, what could be better, and any features you'd like to see added
Need help?
If you have questions or run into any issues, contact us through the help widget at the bottom of the left navigation menu.